
Introduction
No oven? No problem! The art of creating no-oven desserts or no-oven meals has become a popular way to whip up sweet treats without the hassle of baking. Whether you’re looking for quick solutions for a busy schedule, avoiding overheating your kitchen, or simply lacking an oven, there are countless delectable options to explore. These desserts are ideal for beginners, fun for kids, and just as satisfying as their baked counterparts.
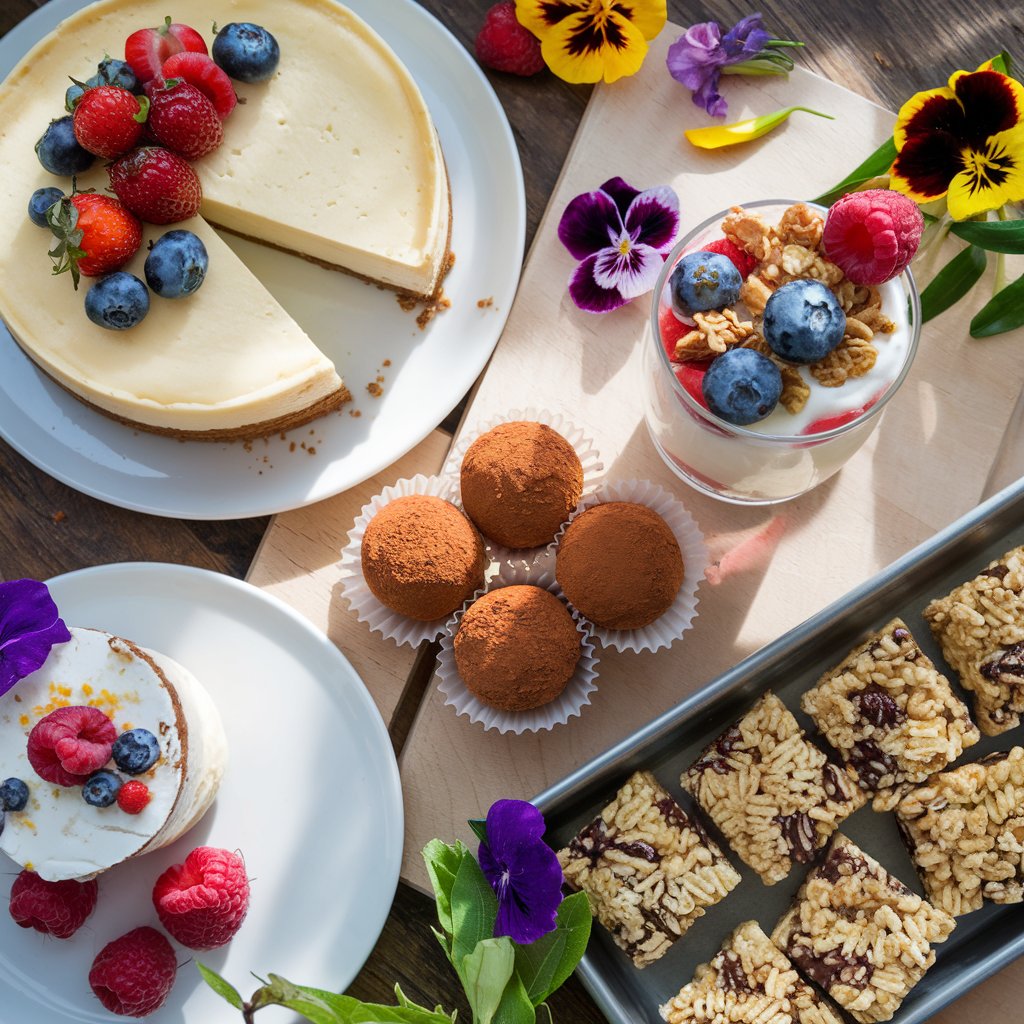
In this article, we will guide you through the world of no-oven dessert recipes, highlight their benefits, introduce a variety of ideas, and provide practical tips for crafting the perfect no-bake treats. From creamy cheesecakes to refreshing parfaits and crunchy rice treats, you’ll have a treasure trove of recipes to indulge in.
Benefits of No-Oven Desserts
Convenience and Accessibility
One of the primary benefits of no-oven desserts is their simplicity. You don’t need special baking tools or an oven, which makes these recipes accessible for everyone, including students, individuals in small apartments, or those who don’t bake often. With just a few common kitchen items like mixing bowls, spatulas, and a refrigerator, you’re set to create delicious desserts.
Time-Saving
Unlike baked desserts, which often require preheating, precise timing, and cooling, no-oven desserts are much faster to prepare. Most recipes involve minimal cooking or assembly, allowing you to save valuable time while still creating something impressive.
Kid-Friendly
No-oven desserts are a fantastic way to get children involved in the kitchen. Since these recipes typically don’t require high heat or complex techniques, kids can help mix ingredients, layer components, or shape treats. It’s a fun and safe activity for the whole family.
Perfect for Any Season
These desserts shine during the warmer months when turning on the oven can make your kitchen uncomfortably hot. However, they’re also great year-round, especially for holidays or events when your oven may already be busy with other dishes.
Endless Variety
From creamy and indulgent options to light and refreshing ones, no-oven desserts cater to all preferences. Whether you crave chocolate, fruit, or something nutty, there’s a no-bake recipe for everyone.
Types of No-Oven Desserts
Creamy and Decadent
These desserts, such as cheesecakes, mousse cups, and puddings, are rich in texture and flavor. They often rely on cream cheese, condensed milk, or whipped cream as their base and are set in the refrigerator rather than baked.
Crunchy and Chewy
For those who love texture, recipes like Rice Krispie treats, granola bars, or cookie dough bites provide satisfying crunch and chew without requiring an oven.
Frozen Delights
Icebox cakes, popsicles, and homemade ice cream are perfect examples of desserts that rely on chilling rather than baking. These treats are ideal for summer or anytime you want a cold, refreshing indulgence.
Fruity and Fresh
Parfaits, fruit salads, and no-bake tarts use fresh ingredients to deliver vibrant flavors and vibrant colors. These desserts are often lighter and great for health-conscious individuals.
Recipes to Try
1. Classic No-Bake Cheesecake
A no-bake cheesecake is a creamy, crowd-pleasing dessert that requires no oven time and can be easily customized with your favorite toppings.
Ingredients:
- 2 cups graham cracker crumbs
- 1/2 cup unsalted butter, melted
- 2 packages (8 oz each) cream cheese, softened
- 1 cup powdered sugar
- 1 tsp vanilla extract
- 1 1/2 cups heavy cream, whipped
- Optional toppings: fresh berries, chocolate sauce, or caramel drizzle
Instructions:
- Mix the graham cracker crumbs and melted butter in a bowl. Press the mixture into the bottom of a springform pan to form the crust. Chill for 30 minutes.
- In another bowl, beat the cream cheese, powdered sugar, and vanilla extract until smooth.
- Gently fold the whipped cream into the cream cheese mixture.
- Spread the filling evenly over the crust and smooth the top. Cover and refrigerate for at least 4 hours or overnight.
- Add your desired toppings before serving.
2. Chocolate Truffle Balls
These rich, bite-sized treats are perfect for chocolate lovers and require only a few simple ingredients.
Ingredients:
- 1 cup dark chocolate chips
- 1/2 cup heavy cream
- 1/4 cup cocoa powder or powdered sugar (for coating)
Instructions:
- Heat the heavy cream in a saucepan over low heat until it begins to simmer.
- Remove from heat and pour over the chocolate chips in a bowl. Let it sit for 2 minutes, then stir until smooth.
- Refrigerate the mixture for 1-2 hours until firm.
- Scoop small portions and roll them into balls with your hands. Coat each ball with cocoa powder or powdered sugar.
- Chill until ready to serve.
3. Fruity Yogurt Parfaits
These light and refreshing desserts are perfect for breakfast or as a healthy treat.
Ingredients:
- 2 cups Greek yogurt (plain or flavored)
- 1/4 cup honey or maple syrup
- 1 cup granola
- 1 1/2 cups fresh fruit (berries, mango, or banana slices)
Instructions:
- In a bowl, mix the yogurt with honey or maple syrup for sweetness.
- In serving glasses, layer granola, yogurt, and fresh fruit. Repeat until the glass is full.
- Garnish with a few fruit pieces or a drizzle of honey.
- Serve immediately or refrigerate until ready to enjoy.
4. Peanut Butter Rice Krispie Treats
These chewy, nutty bars are perfect for satisfying sweet cravings and are incredibly easy to prepare.
Ingredients:
- 4 cups crispy rice cereal
- 1 cup peanut butter
- 1/2 cup honey
- 1/2 cup chocolate chips (optional)
Instructions:
- In a saucepan over low heat, warm the peanut butter and honey until smooth and combined.
- Remove from heat and pour the mixture over the rice cereal in a large bowl. Mix until the cereal is fully coated.
- Press the mixture into a greased or lined baking dish.
- Optional: Sprinkle chocolate chips on top and press gently to adhere.
- Chill for 1-2 hours, then cut into squares and serve.
5. Icebox Cake
An icebox cake is a no-bake layered dessert that comes together with simple ingredients and a bit of refrigeration.
Ingredients:
- 2 cups whipped cream or whipped topping
- 1 package (200g) chocolate wafer cookies or graham crackers
- Optional: crushed nuts, chocolate shavings, or fruit for garnish
Instructions:
- In a serving dish, spread a thin layer of whipped cream.
- Add a layer of cookies or graham crackers over the whipped cream, ensuring they are close together.
- Repeat with alternating layers of whipped cream and cookies until you reach the top of the dish.
- Garnish with your preferred toppings.
- Cover and refrigerate for at least 6 hours or overnight to allow the cookies to soften.
- Slice and serve.
Tips for Perfect No-Oven Desserts
1. Choose Quality Ingredients
Since no-oven desserts often have fewer ingredients, their flavors rely heavily on the quality of those ingredients. Opt for fresh fruit, high-quality chocolate, and premium cream or yogurt to ensure the best taste and texture.
2. Prepare Your Workspace
No-oven recipes require precision and organization. Set up your workspace by measuring ingredients beforehand, clearing your kitchen counters, and ensuring all necessary tools (like mixing bowls, spatulas, and molds) are within reach.
3. Master the Art of Layering
Layering is a common technique in no-oven desserts, especially in parfaits, cheesecakes, and icebox cakes. To achieve a professional look:
- Use clear containers to showcase layers.
- Evenly spread each layer using a spatula or the back of a spoon.
- Allow enough time for layers to set before adding the next one.
4. Use a Food Processor for Crusts
For desserts requiring crusts, such as cheesecakes or tarts, a food processor can quickly crush cookies, crackers, or nuts into a fine, even texture. Add melted butter to bind the crumbs together, ensuring a firm and cohesive crust.
5. Be Patient with Chilling
Chilling is critical for setting most no-oven desserts. Whether it’s a cheesecake or truffles, rushing this step can result in a runny or unstructured dessert. Always follow the recommended chilling time, and if possible, refrigerate overnight for better results.
6. Experiment with Substitutions
Many no-oven desserts are flexible, allowing for ingredient substitutions to match dietary preferences:
- Use almond or oat milk instead of heavy cream for a lighter option.
- Swap graham crackers with gluten-free cookies for gluten-free versions.
- Replace sugar with natural sweeteners like honey, maple syrup, or stevia.
7. Get Creative with Presentation
Presentation can elevate even the simplest no-oven desserts. Use decorative piping for whipped cream, sprinkle garnishes like chocolate shavings, nuts, or fresh fruit, and serve desserts in elegant glasses or dishes.
8. Store Properly
No-oven desserts are often made with dairy or fresh ingredients, so proper storage is crucial. Keep them refrigerated until serving, and use airtight containers to maintain freshness. Desserts with fresh fruit are best consumed within 1-2 days.
9. Avoid Over-Mixing
While combining ingredients, especially whipped cream or egg whites, be cautious not to over-mix. Over-mixing can deflate the texture, resulting in a dense dessert rather than a light and airy one.
10. Start with Simple Recipes
If you’re new to no-oven desserts, begin with straightforward recipes like yogurt parfaits or truffles before tackling layered cheesecakes or elaborate icebox cakes. As you gain confidence, you can explore more complex ideas.
Common Mistakes to Avoid
1. Not Following Chilling Times
Skipping or shortening chilling times can prevent desserts from setting properly. Always allow enough time for the dessert to solidify, especially for recipes like cheesecakes or icebox cakes.
2. Using the Wrong Tools
Using incorrect tools, such as a dull knife for cutting or an unsuitable mold, can make preparation difficult and affect presentation. Invest in tools like springform pans, silicone molds, and spatulas for better results.
3. Overloading Layers
While layering adds visual appeal, overloading layers with too much filling or topping can make desserts messy and difficult to serve. Aim for balance in each layer to maintain structural integrity and presentation.
4. Not Tasting as You Go
No-oven desserts often have no baking step to correct flavors. Taste your mixtures as you go to ensure the sweetness, flavor, and texture are just right.
5. Neglecting Dietary Restrictions
When making no-oven desserts for gatherings, consider potential dietary restrictions. For example, some guests may require gluten-free, dairy-free, or nut-free options. Be sure to label desserts clearly when serving.
FAQs About No-Oven Desserts
1. Can no-oven desserts be made healthier?
Yes, many no-oven desserts can be modified to suit healthier lifestyles. Use natural sweeteners like honey or maple syrup instead of refined sugar, Greek yogurt instead of heavy cream, or whole-grain crackers for crusts. Adding fresh fruits and nuts can also boost nutritional value.
2. How long do no-oven desserts last?
The shelf life depends on the ingredients. Most no-oven desserts, especially those with dairy or fresh fruits, should be consumed within 2-3 days and stored in an airtight container in the refrigerator. Desserts like truffles or Rice Krispie treats may last up to a week.
3. What can I use if I don’t have a food processor?
If you don’t have a food processor, you can crush cookies, crackers, or nuts by placing them in a resealable plastic bag and rolling over them with a rolling pin until fine crumbs form. This manual method works well for creating crusts or crumb coatings.
4. Can I freeze no-oven desserts?
Many no-oven desserts freeze well, such as cheesecakes, icebox cakes, and truffles. Wrap them tightly in plastic wrap and place them in a freezer-safe container. Thaw in the refrigerator before serving to retain their texture and flavor.
5. Are no-oven desserts suitable for large gatherings?
Absolutely! No-oven desserts are easy to scale up for larger crowds. Icebox cakes, parfaits, and truffles are particularly suitable because they can be prepared in bulk and served in individual portions or family-style.
6. What can I do if my dessert doesn’t set properly?
If a dessert doesn’t set:
- For cheesecakes or puddings: Chill longer or mix in a thickening agent like gelatin or cornstarch.
- For crusts: Press the crust more firmly and add more melted butter to help it bind.
- For layers: Refrigerate between layers to allow each layer to firm up properly.
Conclusion
No-oven desserts are a versatile, convenient, and delicious way to satisfy your sweet cravings without the need for baking. From creamy cheesecakes to crunchy Rice Krispie treats and refreshing parfaits, there’s a dessert for every taste and occasion. These recipes not only save time but also open up endless opportunities for creativity in the kitchen.
By following the tips and avoiding common mistakes, you can create flawless no-oven desserts that impress family, friends, or even yourself. Whether you’re a seasoned cook or a kitchen novice, no-oven desserts are an accessible and rewarding culinary adventure.
Now that you’ve explored the basics and recipes, it’s time to get started! Gather your ingredients, clear some fridge space, and enjoy the process of making these delightful treats.